
Practical Ways To Group Customers By Location In QuickBooks Desktop
Two field‑tested ways to design your customer list so you can see balances and sales area‑wise without breaking reports.
If you sell across multiple cities, regions or countries, you need a clean way to see customer balances and sales area wise. In QuickBooks Desktop Enterprise this is possible, but only if you design your customer list correctly from the start. Below are two practical methods that actually work in the real world.
Need extra customer attributes too?
Do not force everything into the location structure. Use hierarchy or Customer Type for geography, then use custom fields only for the extra business attributes that reports genuinely need.
Method A, Parent Customer As Region, Jobs As Cities, Customers Under Each Job
This approach is powerful when you want a visual tree and you care a lot about reporting at “area first, customer second”.
- Create a Parent Customer for each major region. Examples:
- Punjab, Customers
- Sindh, Customers
- UAE, Customers
- Create Jobs under each Parent for cities or smaller areas. For example under Punjab, Customers, make jobs:
- Lahore, City
- Faisalabad, City
- Multan, City
- Create the actual end customers inside the relevant job. So if you have a client “ABC Traders” in Lahore, its full path becomes:
Punjab, Customers > Lahore, City > ABC Traders - Always use the lowest level customer on transactions. When you make invoices, sales receipts, credit memos, etc, choose the final customer (e.g. ABC Traders) not the parent.
Reporting Benefits
- In Customer Center, you immediately see regions, cities and all customers grouped cleanly.
- Customer Balance Detail and A/R Aging can be quickly filtered by the parent or the city-level jobs to see total outstanding per area.
- Management can drill from high-level region numbers down to city and then to individual accounts in a few clicks.
When This Method Makes Sense
- You have many customers per city/region.
- You need to see outstanding balances and transaction history grouped geographically.
- Your sales reps, branches or distributors are responsible for specific areas.
Method B, Use Customer Type For Regions / Segments
This method is faster to set up if you already have a long customer list and do not want to rebuild the hierarchy.
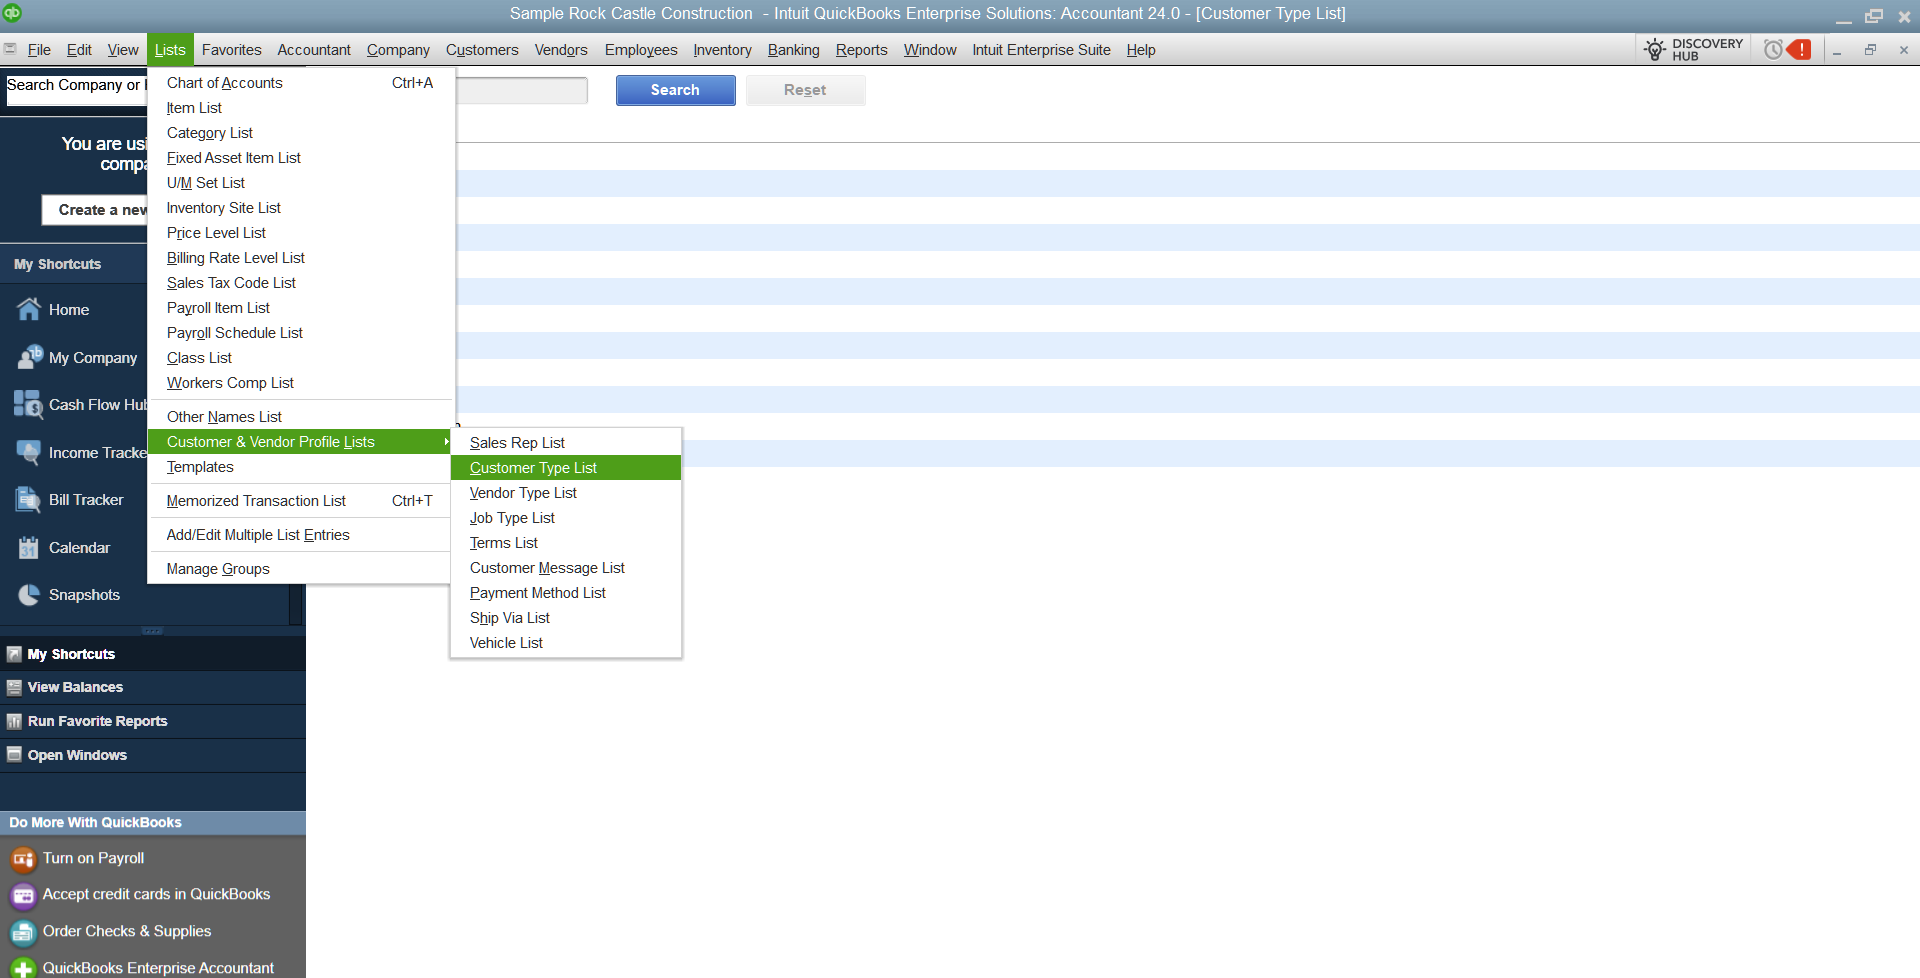
- Open the Customer Type List. Go to Lists > Customer & Vendor Profile Lists > Customer Type List.
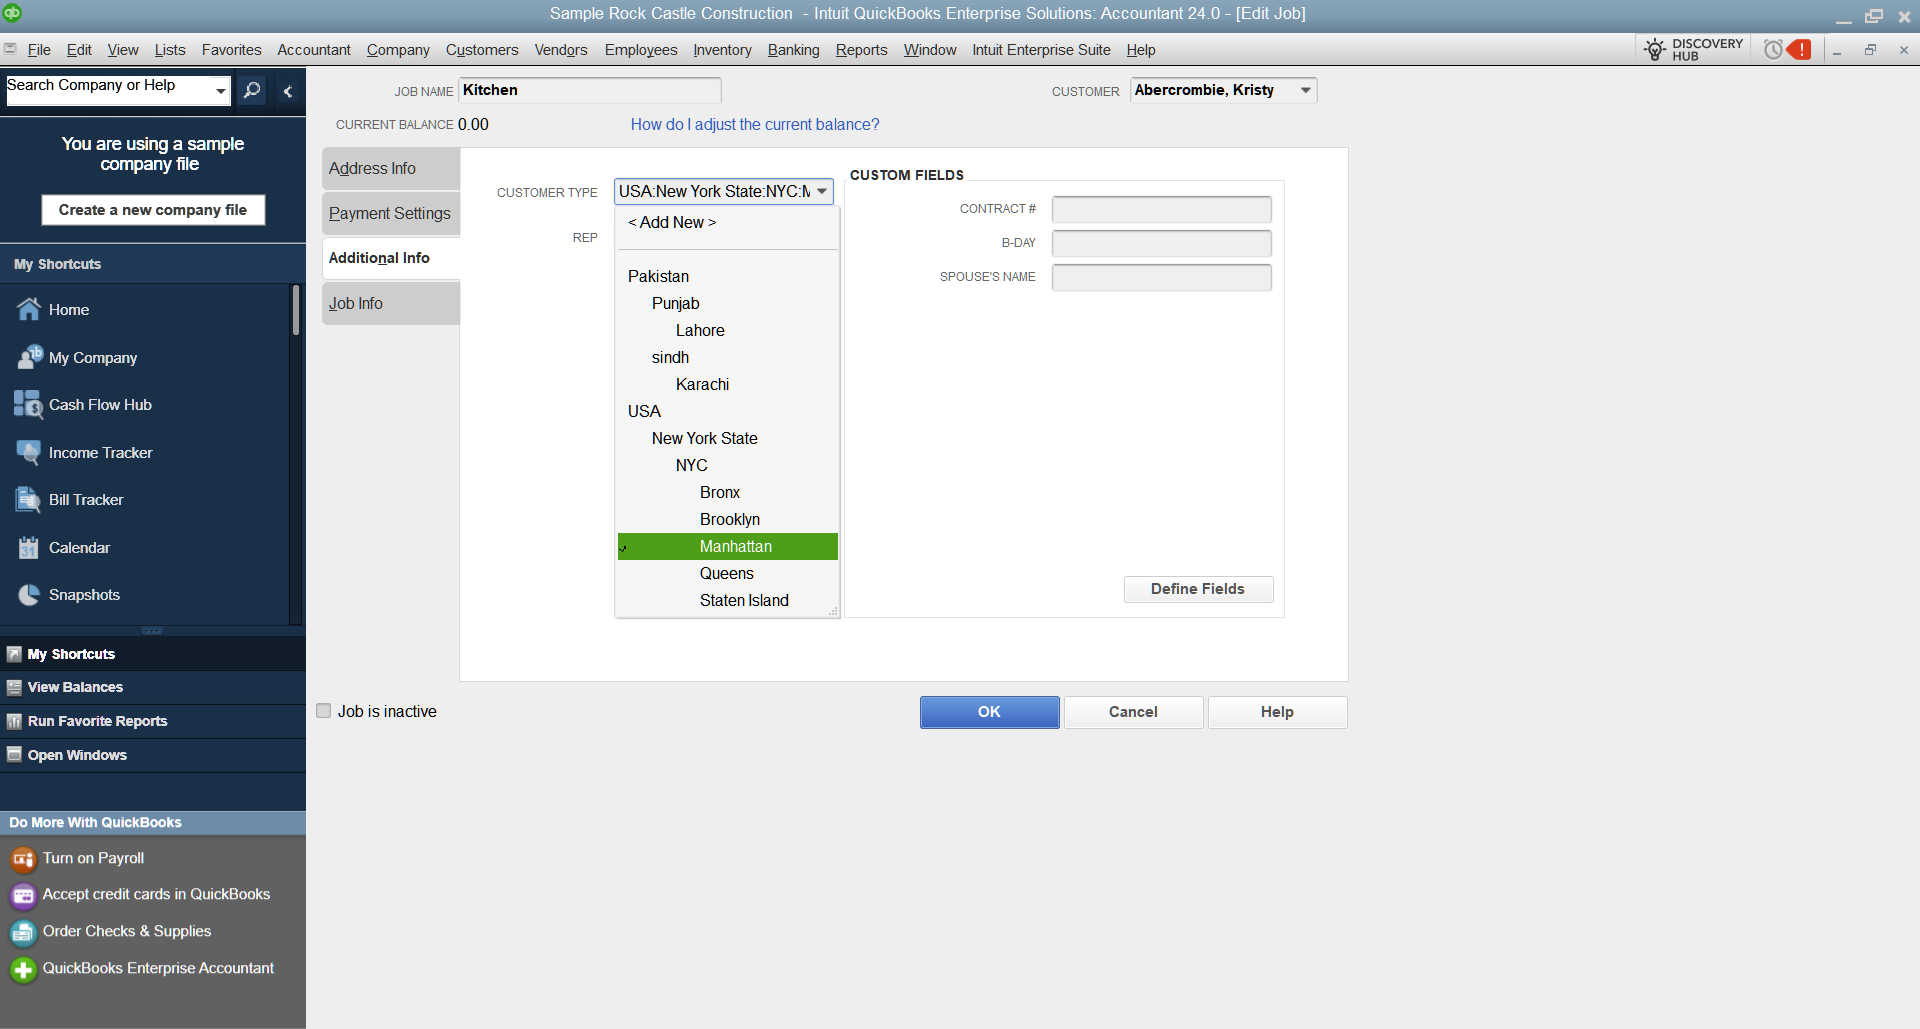
- Create customer types that represent regions or segments. Examples:
- Region, Lahore
- Region, Karachi
- Region, Islamabad
- Region, UAE
- Edit each customer and assign the correct customer type. Open the customer, click the Additional Info tab and set the type.
How To Report Using Customer Type
- Run Customer Balance Detail, click Customize Report and filter by Customer Type to see all balances for a specific region.
- Use the Columns tab to add Customer Type as a column and then sort or subtotal by it.
Why Customer Type Works Better Than Custom Fields For This
Many people try to build location reporting using custom fields on customers. The problem is that custom fields do not flow cleanly into all A/R reports, and payment reports often do not show them the way you expect. Customer Type is a built-in field designed for segmentation and works reliably with standard QuickBooks Desktop reports. If you still need extra account attributes beyond geography, use custom fields for those separately instead of mixing both jobs into one field.
Which Method Should You Use?
- If you are setting up from scratch and want a clean tree: use Method A (Parent/Job structure).
- If you already have hundreds of customers in one flat list: use Method B (Customer Types).
- Advanced setups sometimes mix both: Parent customer by region and customer type by business segment (e.g. Retail, Distributor, Online).
Want this built correctly, not guessed?
If you want the customer structure, reporting flow, server setup, and accountant guidance handled together, talk to us.
Talk to us See turnkey implementations